The AI Architect
Motto: "AI builds your apps. You own the infrastructure."
Struktural features a built-in AI Architect accessible directly from the Studio Home screen. Instead of manually creating tables, scaffolding UI views, and writing C# validation scripts from scratch, you can describe your business requirements in natural language.
The AI Architect does not generate untamperable "black-box" binaries. Instead, it generates the exact same standard JSON schemas and .cs.script files that a human developer would create. Once the AI finishes, you have total freedom to edit the database schema, modify the UI layouts via the drag-and-drop canvas, or refine the C# business logic.
The Conversational Interface
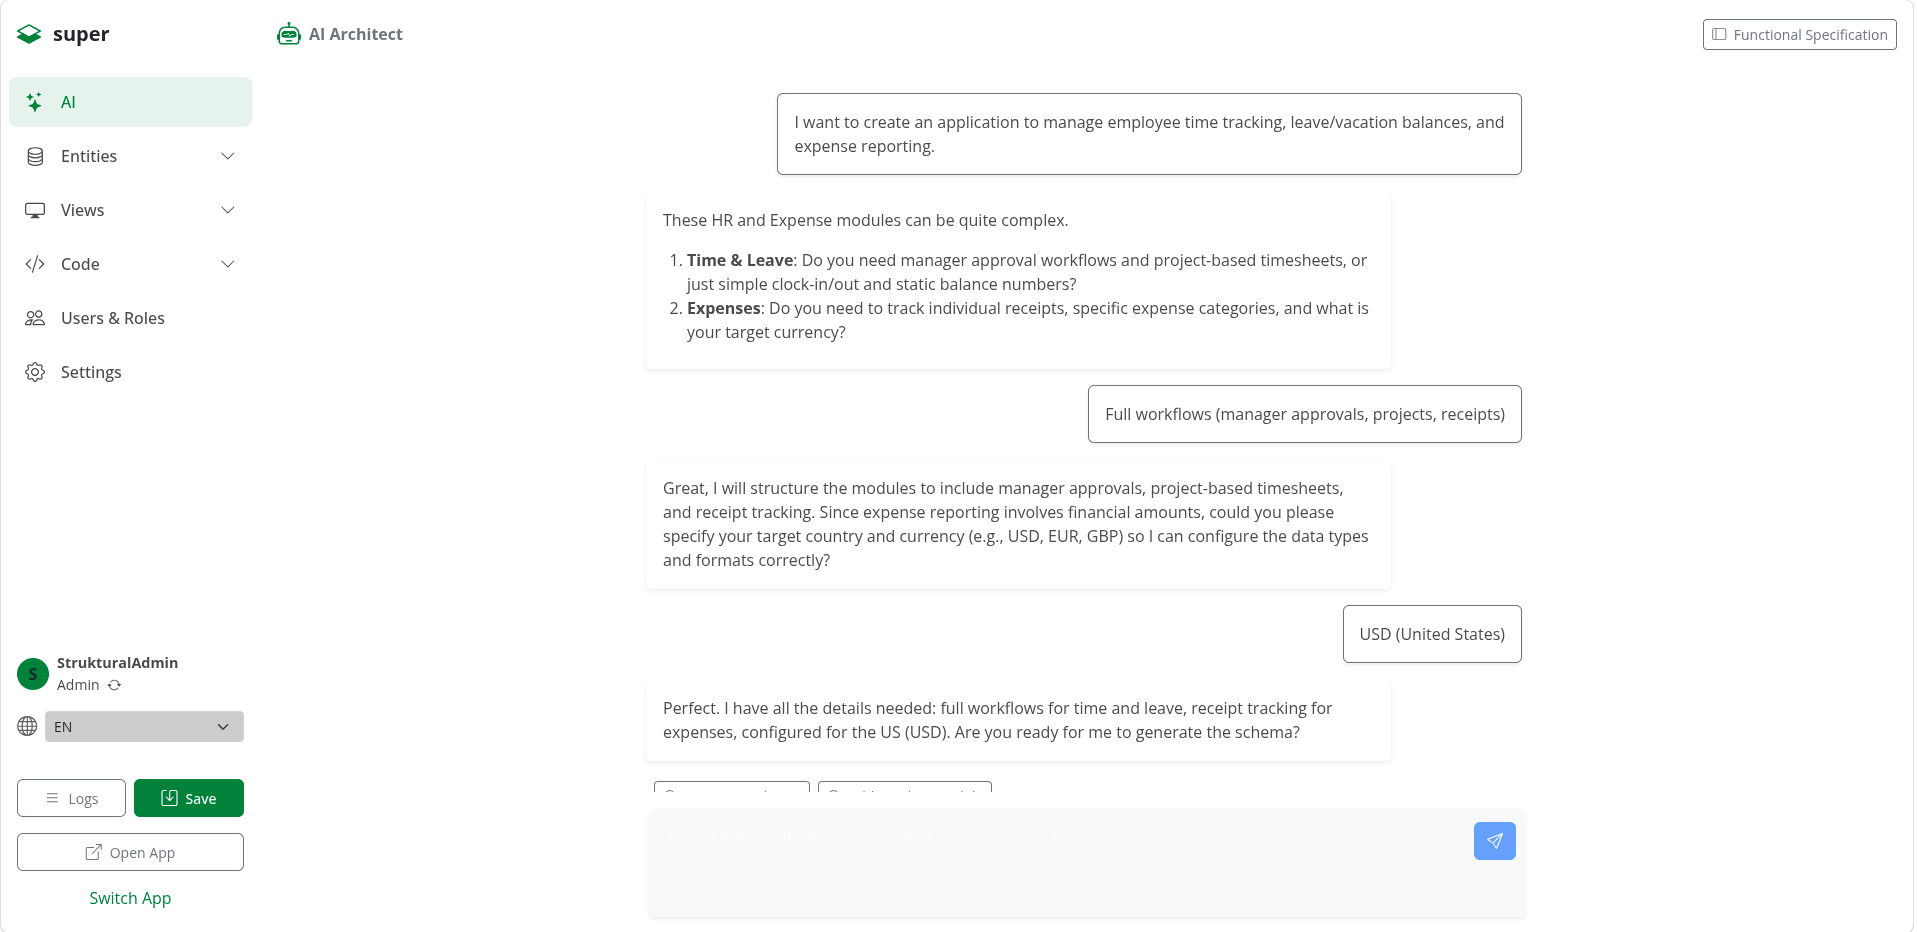
Navigate to the AI module (the home screen of the Studio).
You are presented with a chat interface. Here, you can describe what you want to build (e.g., "I need a CRM for a real estate agency to track Properties, Leads, and Viewings. Leads should have a status pipeline. Viewings need to be scheduled on a calendar.").
The AI will respond, asking clarifying questions. Once the requirements are clear, the AI proposes transitioning into the Generation Pipeline.
The Generation Pipeline
App generation in Struktural is not a blind "one-click" process. It is a structured, multi-step pipeline designed to give architects visual oversight and approval points.
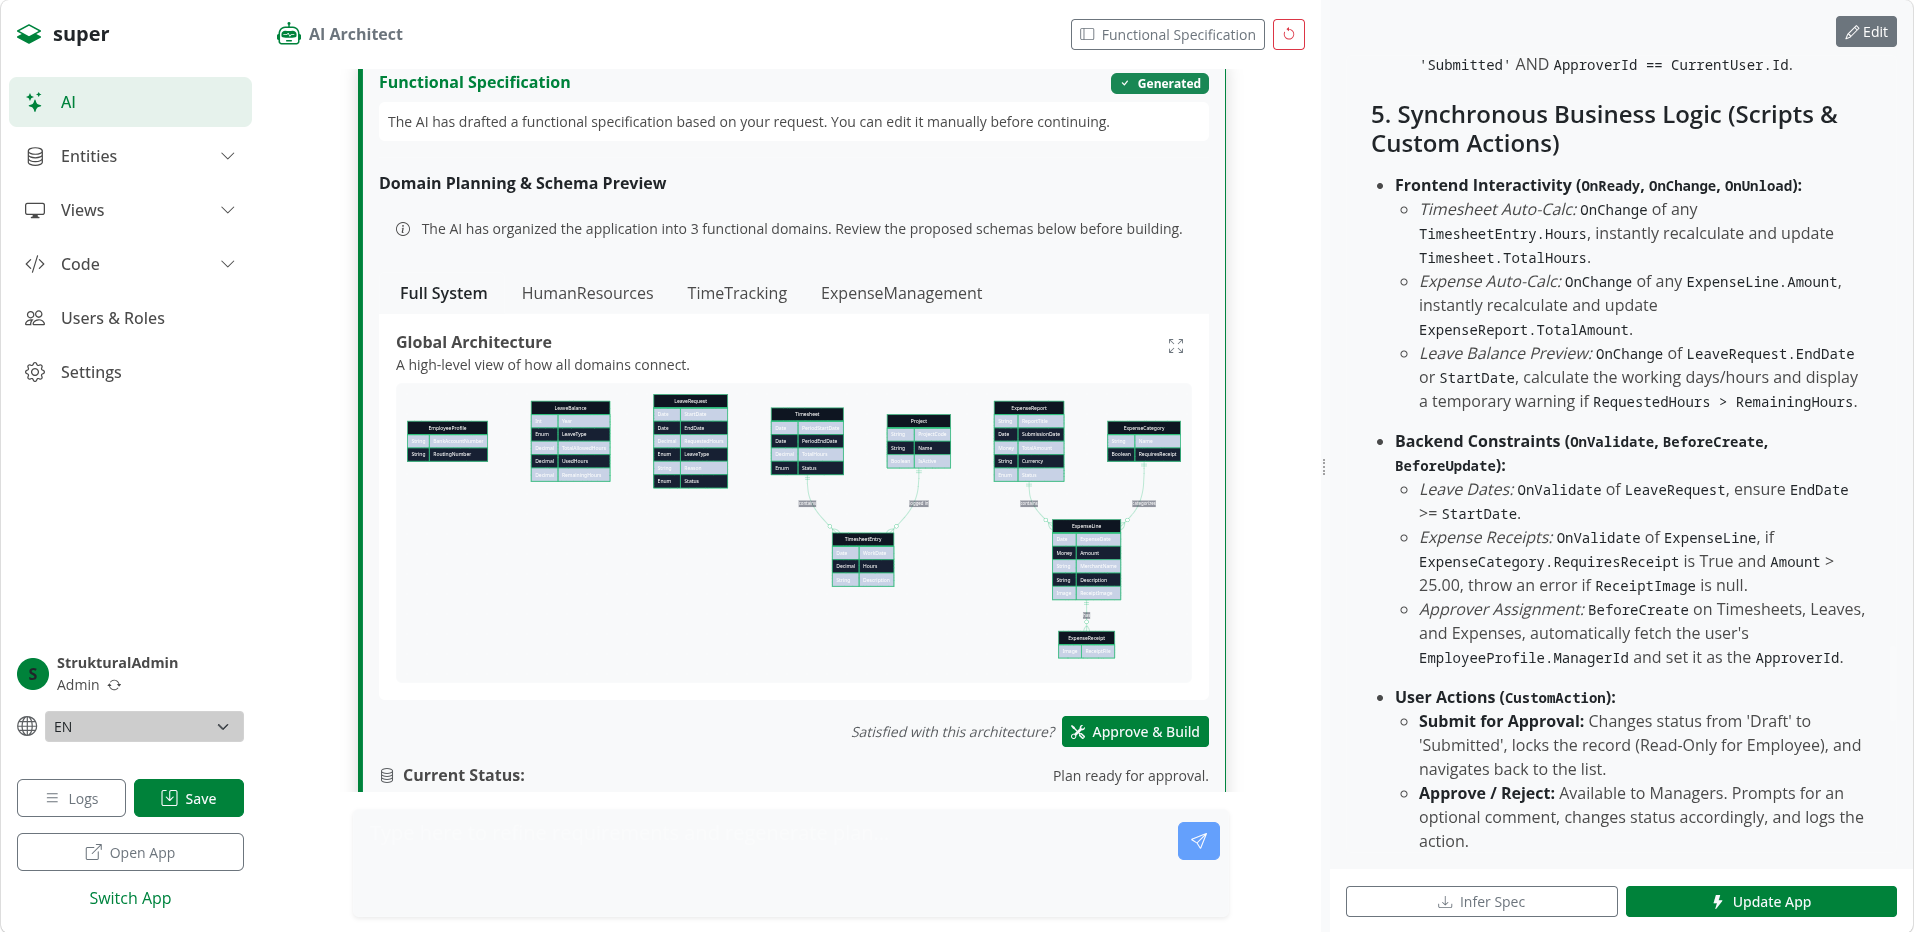
Step 1: Functional Specification
The AI synthesizes the chat history into a formal Markdown document called the Functional Specification. A side panel opens automatically, allowing you to manually edit this specification before proceeding. This acts as the "source of truth" for the rest of the generation process.
Step 2: Domain Planning & ERD Preview
The AI analyzes the specification and breaks the application down into logical Domains. For each domain, it generates a proposed Entity Relationship Diagram (ERD).
- Visual Validation: The Studio renders the ERD directly in the UI using Mermaid.js. You can visually inspect the proposed tables, foreign keys, and relationships.
- Approval: If you are satisfied with the architecture, you click Approve & Build. If not, you can type feedback into the chat to refine the plan.
Step 3: Construction (Entities & UI)
Once approved, the AI operates autonomously:
- Data Schema: It generates the
EntityDefinitions(Tables, Fields, Constraints). - Views: It scaffolds the UI layouts (
Grid,Form,Calendar,Card). - Menu & Branding: It builds the application's sidebar navigation and generates a cohesive color palette/theme.
Step 4: Business Logic
The AI leverages the Functional Specification to identify required behaviors.
- C# Scripts: It writes Roslyn
.cs.scriptfiles to handle validations (e.g., verifying a Lead's phone number format) and lifecycle hooks (e.g., calculating the commission of a Property sale). - Workflows: It orchestrates background processes (e.g., a workflow that sends an email notification to the agent when a new Viewing is scheduled).
Step 5: Translations & Data Seeding
- Multilanguage: It translates UI labels and domain keys into the languages configured for the tenant.
- Master Data: It automatically seeds the database with realistic sample data (maintaining referential integrity via negative IDs) so the application looks populated and ready to demo immediately.
Applying the Blueprint
Throughout the pipeline, all changes exist only in the Studio's local memory (Draft State).
Once the pipeline concludes successfully, you click Apply & Reload. The platform writes the schemas to disk, triggers the Entity Framework Core migrations to construct your physical SQL tables, and hot-reloads the Kestrel server.
Your custom, enterprise-grade application is now live on your own infrastructure.